|
Bowline
How to tie the Bowline:
   
Figure-Eight Loop or Figure-Eight on a Bight or Flemish Loop
How to tie
the Figure-Eight Loop:
   
To tie this knot, you simply double the rope and then tie a basic Figure-Eight Knot. In Figure 4, the loop
is dressed with a Double Overhand Knot.
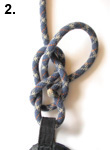
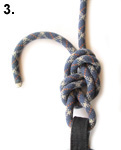
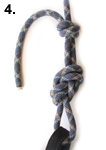
Bowline on the Bight
How to Tie the Bowline on the Bight
      
- First double the rope to create a "bight" in the rope (an open loop). Then create a small loop in the bight (the
doubled rope) just like you would for a basic Bowline, and bring the end of the bight through the small loop. This creates
two big loops which hangs below the knot.
- Now open up the end of the bight a little bit and bring it back down over the two main loops, and then continue
bringing the end of the bight around behind the two main loops and up to the other side of the small initial loop.
- Dress and set the knot.
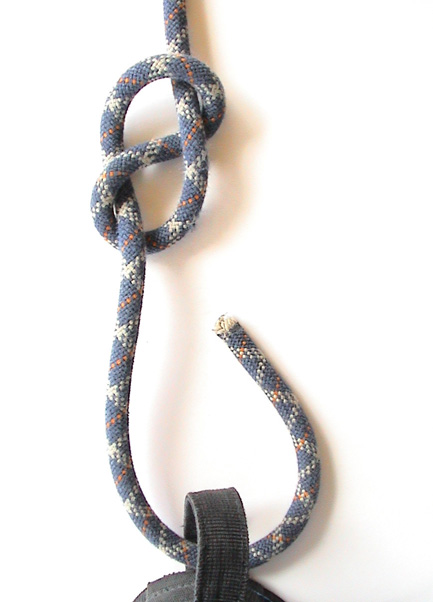
Figure Eight Follow Through
If you are a beginner climber and can only remember one knot, let it be this one. I'd be very
surprised if any climber did not know this knot. Among other uses, it's very popular as a "tie in" for attaching the climbing
rope to your harness. With that in mind, follow these steps to "tie in" with the Figure Eight knot:
Step 1: Form a single figure eight in the end of the rope and feed the tail through your harness. Some harnesses
require that you feed the rope through certain straps. When tying in, I like to feed rope through the same harness straps
that the belay loop occupies (not pictured), others prefer to use the belay loop (as pictured). Still others prefer to tie
into a steel locking carabiner, or two aluminium locking carabiners, gates reversed, which have been clipped into the appropriate
harness straps. There are pros & cons. Consult your harness manual for the recommended tie in point.
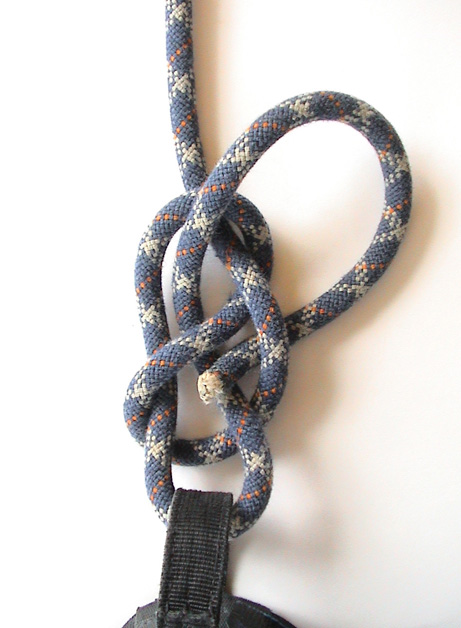
Steps 2 & 3: Rethread the figure eight, following the same path as the first. Pull
the knot tight (though some climbers prefer to leave it a little loose to absorb force from a fall). Make sure you have enough
tail, as the knot will slip a bit when loaded. Check the knot by counting "two", "two" & "two", for the three visible
doubled strands. Ensure they each are lying flat and not crossing over themselves.
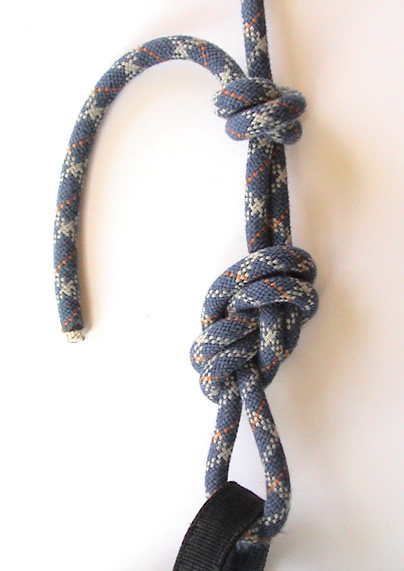
Step 4: An optional step. If you find yourself with too much tail, or are paranoid about the figure eight slipping,
tie a stopper knot with the remaining tail.
It is recommended that you check your partner's tie in knot, and get them to check yours before
climbing.
Here are some rock climbing clips:
Tannin (about 1min.)
|